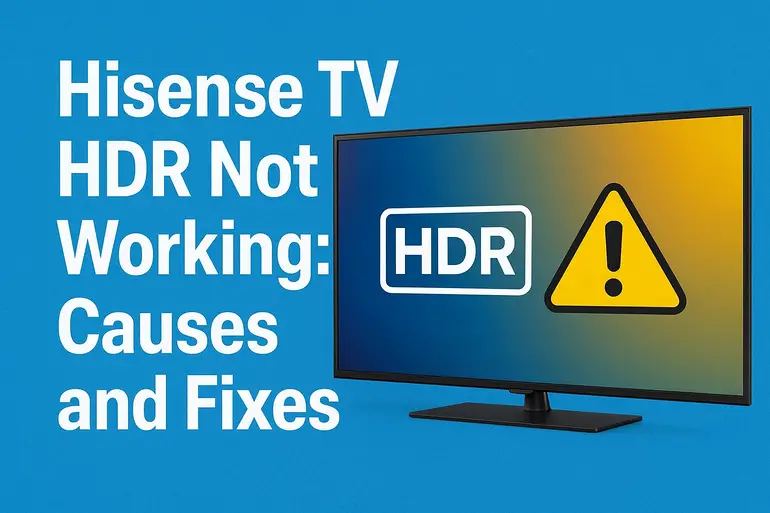
You’ve been waiting all week to watch that new movie everyone’s talking about. You fire up your Hisense TV, hit play, and something feels off. The colors look washed out, the contrast is flat, and those stunning visuals you saw in the trailer? Nowhere to be found. Your HDR isn’t kicking in.
This happens more often than you’d think. HDR technology should make your viewing experience pop with vibrant colors and deeper blacks, but sometimes it just refuses to cooperate. The good thing is that most HDR issues aren’t complicated hardware failures.
Let me walk you through why this happens and exactly how to get those brilliant images back on your screen. Most of these fixes take just a few minutes, and you won’t need any special tools or technical knowledge.
What’s Really Going On With Your HDR
HDR stands for High Dynamic Range, and it’s what makes modern content look incredibly lifelike. Think of it as the difference between looking through a dirty window and a crystal-clear one. HDR expands the range of colors and brightness levels your TV can display, creating images that feel almost three-dimensional.
Your Hisense TV needs several things to align perfectly for HDR to work. The content you’re watching must be HDR-encoded, your source device needs to support HDR output, the HDMI cable must be capable of handling the extra data, and your TV settings need to recognize and process the HDR signal. When even one piece of this puzzle is missing, you’re stuck watching standard dynamic range content.
Most people notice the problem immediately. Colors that should be vibrant look muted and dull. Dark scenes lose their depth, appearing gray instead of truly black. Bright highlights don’t have that eye-catching punch anymore. Sometimes the TV displays an HDR badge on the screen but the picture quality doesn’t match what you’re seeing on your friend’s TV.
The frustrating part is that HDR might work perfectly with one app or device but fail completely with another. You might get gorgeous HDR from your PlayStation but nothing from your streaming stick. This inconsistency makes troubleshooting tricky, but it also tells you that your TV’s HDR capability is fine. Something else is blocking the signal.
Hisense TV HDR Not Working: Likely Causes
Your HDR problems usually stem from a handful of common issues. Let’s look at what’s probably causing your TV to ignore those HDR signals.
1. HDMI Port and Cable Limitations
Not all HDMI ports on your Hisense TV support HDR, and this catches a lot of people off guard. Many Hisense models have four HDMI ports, but only one or two are equipped to handle HDR content. Check your TV’s manual or look at the labels near the HDMI ports. You’ll often see HDMI 1 or HDMI 2 marked as the HDR-compatible ports.
Your cable matters just as much as the port. Older HDMI cables don’t have the bandwidth to carry HDR data. You need an HDMI 2.0 cable at minimum for standard HDR, and HDMI 2.1 for advanced formats like Dolby Vision. That cable you’ve been using for five years might look fine, but it could be your bottleneck.
Sometimes the cable connection itself is loose or dirty. A poor connection disrupts the handshake between your source device and TV, preventing HDR from activating. Even slight contact issues can cause the signal to drop back to standard definition.
2. HDMI Enhanced Format Setting Disabled
Hisense TVs have a setting called “HDMI Enhanced Format” or “HDMI UHD Color” that must be turned on for each HDMI port you want to use with HDR. This setting isn’t always enabled by default, and many users never know it exists. Without it, your TV limits what signals it accepts through that port.
This setting exists because enhanced formats require more processing power and can occasionally cause compatibility issues with older devices. Hisense plays it safe by leaving it off. Your TV receives the HDR signal but doesn’t process it correctly because the port isn’t configured to handle the extra information. The picture displays but defaults to standard range.
3. Incorrect Picture Mode Selection
Your TV’s picture mode controls how it processes incoming video signals. Hisense TVs typically have modes like Standard, Vivid, Theater, and Game. Not all of these modes support HDR processing, and some actively interfere with HDR playback. Theater mode usually works best, but your TV might be set to something else.
The picture mode also controls whether HDR settings are even accessible. If you’re in the wrong mode, the HDR options in your menu might be grayed out or hidden entirely. This creates a confusing situation where you know your content is HDR and your cable is good, but you can’t find the settings to enable it.
4. Source Device Settings Not Configured
Your streaming device, game console, or Blu-ray player needs to be set up correctly too. These devices don’t automatically output HDR to every TV. Many have settings you need to manually enable, and manufacturers don’t always make them obvious. Your PlayStation might be set to automatic video output, which sometimes defaults to standard range for compatibility reasons.
Streaming apps within devices can have their own quality settings as well. Netflix, Disney+, and other services let you control playback quality, and if your account settings limit video quality to save bandwidth, you won’t get HDR even though you’re paying for the premium tier. Your device is literally downgrading the signal before it reaches your TV.
Some devices also require software updates to enable HDR compatibility with certain TV brands. That firmware update you’ve been ignoring might be exactly what you need to unlock HDR functionality.
5. Content Isn’t Actually HDR
This one feels embarrassing when you realize it, but it happens all the time. You assume the show or movie you’re watching is in HDR because it’s a new release or because you have a premium subscription. However, not everything on Netflix, Amazon Prime, or Disney+ is HDR content. Many titles are still standard dynamic range.
The app interface can be misleading. A show might be listed in the 4K section, making you think it’s HDR too. But 4K resolution and HDR are separate features. You can have one without the other. Unless you see a specific HDR, HDR10, Dolby Vision, or HLG badge on the title screen, you’re probably watching standard content. Your TV isn’t broken. There’s simply no HDR signal to process.
Hisense TV HDR Not Working: How to Fix
Getting your HDR working again usually takes just a few simple adjustments. Let’s fix this step by step.
1. Switch to an HDR-Compatible HDMI Port
Unplug your HDMI cable from its current port and move it to HDMI 1 or HDMI 2. These ports typically have the enhanced features needed for HDR. Look at the labels on your TV’s back panel or check your user manual to confirm which ports support HDR.
Once you’ve switched ports, go to your TV’s input selection and choose the new HDMI source. Sometimes you need to power cycle both devices after switching ports. Turn off your TV and source device, wait 30 seconds, then power everything back on. This forces a fresh connection and signal detection.
If you have multiple devices and only one HDR port, consider getting an HDMI switch that supports HDR passthrough. This lets you connect several devices to a single HDR-compatible port, switching between them as needed.
2. Replace Your HDMI Cable
Get yourself a certified Premium High Speed HDMI cable or an HDMI 2.1 cable. These aren’t expensive anymore. You can find quality options for under 15 dollars. Make sure the packaging specifically mentions HDR support.
After connecting the new cable, test it with HDR content you know works. A good test is a streaming service’s HDR test patterns or a 4K Blu-ray with HDR. If the new cable fixes the issue, your old cable was the problem. Keep the old cable for non-HDR devices where it will work fine.
3. Enable HDMI Enhanced Format
Grab your remote and press the Settings button. Navigate to Picture Settings, then look for HDMI Format or Signal Format. Select the HDMI port you’re using and enable “Enhanced Format” or “HDMI UHD Color.” The exact wording varies by Hisense model, but you’re looking for any setting that mentions enhanced, UHD, or 4K.
You need to enable this setting for each HDMI port individually. Just because HDMI 1 has it enabled doesn’t mean HDMI 2 does. After enabling the setting, back out of the menu completely and restart your source device. This ensures the new handshake happens with the enhanced format active.
Some Hisense TVs require you to turn off the TV and device, enable the setting, and then power everything back on. If it doesn’t work immediately, try a full power cycle.
4. Change Your Picture Mode
Press the Picture Mode button on your remote (it might be labeled as a button with concentric circles or a picture icon). Cycle through the available modes while playing HDR content. Theater or Cinema mode usually processes HDR best, but try each one to see the difference.
Some Hisense models have a dedicated HDR mode that only appears when HDR content is detected. If you see HDR Theater, HDR Vivid, or HDR Game, select that. These modes are optimized specifically for high dynamic range content and will give you the best results.
After changing the picture mode, go into Picture Settings and make sure any automatic brightness or contrast settings are turned off. Features like “Dynamic Contrast” or “Eco Mode” can interfere with HDR processing. You want the TV to display the HDR signal as intended without additional adjustments.
5. Configure Your Source Device Settings
For streaming devices like Roku, Fire Stick, or Apple TV, go into the device’s display settings. Look for video output or display type settings. Make sure it’s set to Auto or 4K HDR. Some devices have a specific “Match Content” setting that automatically switches to HDR when available. Enable that.
On game consoles, check the video output settings in the system menu. PlayStation 5 has settings under Screen and Video where you can enable HDR. Xbox has similar settings under TV & Display Options. Make sure you enable “Allow HDR” or equivalent options.
For streaming app settings, open Netflix, Disney+, or whichever service you use. Go to account settings (usually on a web browser, not the TV app) and verify your playback quality is set to High or Auto. Some accounts default to Medium to save data, which blocks HDR delivery. While you’re there, confirm your subscription tier includes HDR. Basic plans on some services don’t offer HDR content.
6. Update Your TV and Device Software
Press the Home button on your Hisense remote and go to Settings. Find Support or System, then select Software Update or Check for Updates. If an update is available, install it. This can take 10 to 15 minutes, and your TV will restart. Don’t unplug it during the update.
Do the same for your source devices. Streaming sticks, game consoles, and cable boxes all need regular updates. These updates often include improved HDR compatibility and bug fixes for signal handshake issues.
After updating everything, test HDR again. Sometimes a simple software refresh resolves mysterious compatibility problems that had nothing to do with your cables or settings.
7. Contact a Professional Technician
If you’ve tried everything above and HDR still isn’t working, you might have a hardware issue. Some Hisense TVs have faulty HDMI boards or processing chips that prevent HDR from functioning correctly. This isn’t something you can fix at home.
Reach out to Hisense customer support first. They can run diagnostics remotely and may have model-specific solutions. If your TV is under warranty, they’ll arrange a repair or replacement. For out-of-warranty TVs, find a certified TV repair technician who can diagnose the HDMI board and determine if repair is cost-effective compared to replacement.
Wrapping Up
HDR problems on your Hisense TV usually come down to settings, cables, or port selection rather than actual hardware failure. Most people fix their HDR issues by enabling the enhanced format setting or switching to a better HDMI cable. The key is working through each potential cause systematically.
Start with the simplest solutions first. Check your HDMI port, verify your cable quality, and make sure all the right settings are enabled on both your TV and source device. Once everything is configured correctly, you’ll finally see HDR content the way it was meant to be seen, with those rich colors and dramatic contrast that make modern viewing so impressive.